How to Remove FRP via ADB Command: ADB and Fastboot are arguably two of the most indispensable tools used when working with Android devices. If you really want to modify, debug, and tweak along with their countless uses in rooting, and other procedures ADB and Fastboot are a must for any Android device owner.
Typically if you want to install ADB and Fastboot you have to download and setup the Android SDK (If you really want to learn about Android Development I highly recommend downloading and installing the full Android SDK from here), but this can be unnecessary for people who just want to install ADB and Fastboot.
What is ADB?
ADB is short name for Android Debug Bridge a very useful program made itself by Google for Programmers and developers. Its based on command line and basically communicates with your Android to respond to certain commands. There is vast amount of knowledge about ADB but its most useful commands limit to getting
Logcat:
A real time log of what is happening in background of our devices. It is really useful for developers to see which component has malfunctioned and helps to narrow down their search for what failed and what needs to be fixed. Several times users are asked to give logcats of their devices which are giving errors. We will go in detail that how to get logcats in every and easiest way possible.
App Installation and Management:
adb proves really handy if you want to install apks directly from your PC or want to batch install or delete them.
Shell Execution:
You must have heard of Terminal Emulator. It is an app for android to execute shell commands (linux commands) which are basically present as applets in /system/bin, /system/sbin or /system/xbin(in our case) folders. A very important applet called busybox is installed there mainly used for execution of basic commands during root browsing or ROM installation. Many times updater script of ROMs use busybox commands to install it. Well, these commands can be initiated from your device too but they can be initiated from adb also making it easy for programmers.
Pushing and Pulling:
Most used commands of adb. adb makes it a piece of cake for new device developers to get an idea of structure and basic knowledge of devices by pulling command. We can pull out i.e copy any files or folders from our devices to our PC, even the root directories without rooting the devices. It help rooters and ROM chefs of new devices to get an idea and implement their mods on them. Pushing is also very useful command. It copies your files and folders from PC to your device. Very useful in pushing some /system apps and other things
Remounting and setting permissions
Basic commands:-
Of-course basic commands such as rebooting and rebooting in recovery mode and download mode are supported.
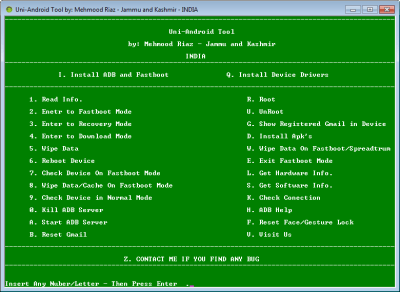
How to Install Minimal ADB and Fastboot on Windows Computer ?
- Your device must be plugged into your computer
- You must have USB Debugging enabled under Developer Options (Note: This may be listed as ADB Debugging on some ROM’s)
- You have installed the necessary drivers and your computer is recognizing your device
- Download the Minimal ADB and Fastboot setup
- Follow the Installers instructions and select where you would like to install Minimal ADB and Fastboot tool (For simplicity I choose to install it to the Desktop)
- After you have chosen where to install Minimal ADB and Fastboot too select whether you would like to create a Start Menu Folder or not for the installation
- Once you have chosen where to install it to and if you want to create a Start Menu Folder select the install option
- After the Installation Wizard has completed you can select to start Minimal ADB and Fastboot
- You can also start Minimal ADB and Fastboot by navigating to the Start Menu Folder you choose to create during installation or the desktop shortcut you choose to create and selecting Minimal ADB and Fastboot
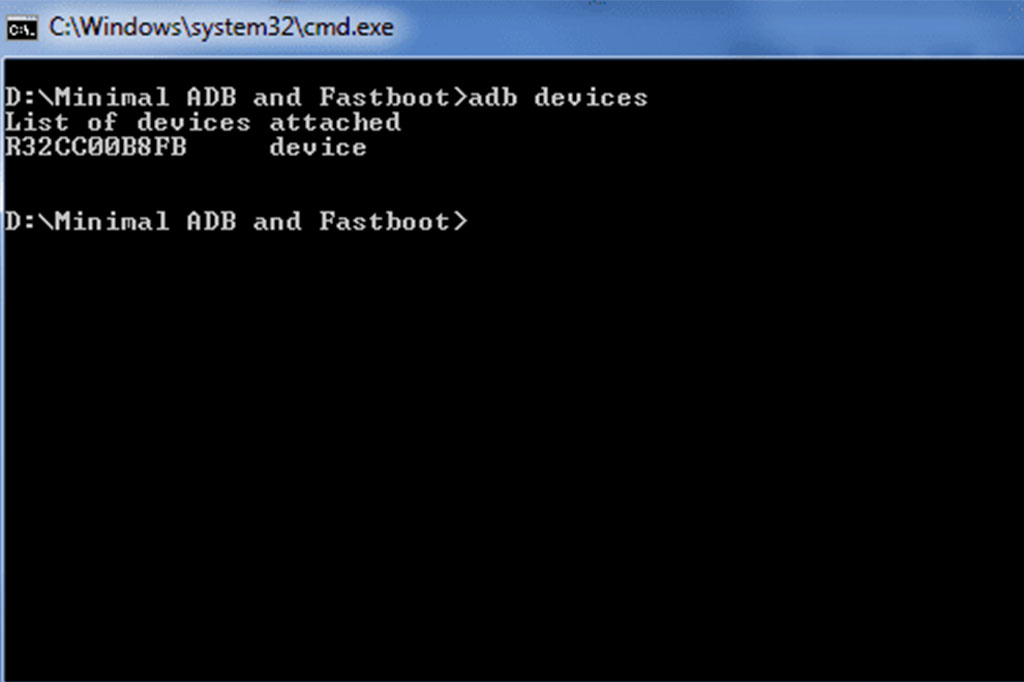
- You should now see a command window open, with the command window open you can now issue ADB and Fastboot commands to your device
Remove SAMSUNG FRP via ADB Command:
- Download Combination file or adb enabled boot file for you cellphone from z3x server, or where ever you want. how to find correct Samsung combination file?
- Edit combination file and flash sboot.img only from you combination file via Odin or any device allows you to skip partitions from md5 firmware, I recommend use z2x box for this.
- Flash only tar (adb enabled file) or sboot.img from .md5 combination file.
- In some cases we need to flash complete combination file, so it’s depends on your cellphone model.
- Your Samsung phone should have adb enabled now.
- Connect phone to pc and install adb drivers if needed.
- Now go to your Minimal adb and fastboot installation folder
- Press and hold [Shift] key on keyboard and right click anywhere at empty area in adb folder
- You will have open command window here or open PowerShell here.
- Click on command window (You need to enter cmd command if you are using windows 10 and have Open PowerShell window here)
Execute this command to bypass Google account verification screen:
adb shell content insert --uri content://settings/secure --bind name:s:user_setup_complete --bind value:s:1Some times you will not receive and OK message in command window but if you have adb access to your phone it will work. Please visit this post “Samsung Android 7.0 FRP Remove [No Box Required]” this can conform no response message in command window but phone activated.
Removing FRP via ADB Command Video:
If above command not work in your case you can try command written below. This will take you to login screen and then you can enter you new Google account.
adb shell am start -n com.google.android.gsf.login/If both previous commands not working then try this.
adb shell am start -n com.google.android.gsf.login.LoginActivityThe method written above should work perfectly, If you have any problem please write in comments below i will try to answer as soon as possible.
How to remove FRP Via Fastboot Command?
In most of Qualcomm and other Android phones you will have fastboot option. So with commands written below you can also remove frp via fastboot.
- Enter your cellphone to Fastboot mode
- Open ADB and Fastboot Terminal as described above.
- Enter command written below.
This will Wipe your cellphone
fastboot -wIf Above Command not works, then use this command this will delete user configurations on your cellphone
fastboot erase configIf Above Command not Working Then use this command
fastboot -i 0x2a96 erase configRemove FRP From SPD and MTK Based Android Phones?
- Go to Setting using This Method. XT1254 FRP Solution or any other witch allows you to enable usb debugging.
- Enable USB Debugging from Setting.
- Open ADB and Fastboot Terminal as described above.
- Use these commands
adb shell content insert --uri content://settings/secure --bind name:s:user_setup_complete --bind value:s:1If above not working then try this command
adb shell am start -n com.google.android.gsf.login/If above not working then try this command
adb shell am start -n com.google.android.gsf.login.LoginActivityPlease don’t hesitate to ask any question about this post, You can write in comments i will try to answer as soon as possible. I just written this post to help my students specially to help him in their work, and people who have forgotten their own Google account Password and facing FRP after hard reset their phones.
YOU MAY ALSO LIKE: