,,,,,,,,,,,,,,,,,,,,,,,,,,,,,,,,,,,,,,,,,,,,,,,,,
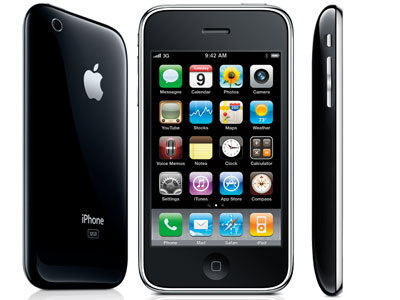
How To Install/Change Camera iPhone 3GS
,,,,,,,,,,,,,,,,,,,,,,,,,,,,,,,,,,,,,,,,,,,,,,,,
1st Step
Remove the two Phillips #00 screws from the dock-connector end of the iPhone.
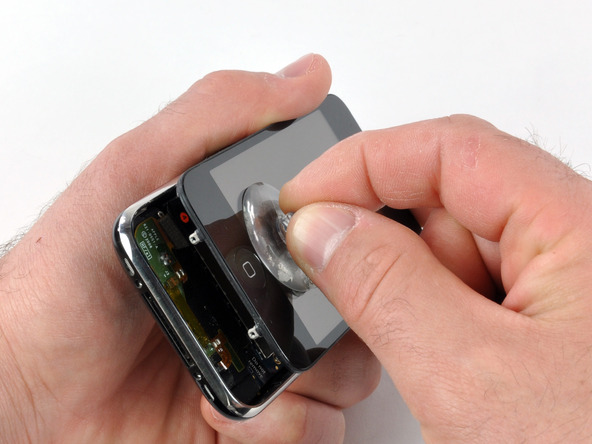
2nd Step
Remove the metal handle from the suction cup. It’s easier and safer to grip the suction cup’s base instead of the metal handle.
There is a rubber gasket between the silver front bezel and black display assembly. A bit of force is required in this step to separate the iPhone’s display assembly.
Be very careful when opening the iPhone so that the cables under the display are not severed.
Use a small suction cup near the Home button to gently pull up the bottom portion of the iPhone’s display assembly.
If the display assembly is to damaged to allow the suction cup to adhere, tape with a strong adhesive such as duct tape maybe used.
3rd Step
The display assembly is still connected to the iPhone by several cables, so don’t try to remove it entirely just yet.
Rotate the display assembly up until it is at an angle of approximately 45 degrees.
4th Step
Continue to hold the display assembly with one hand, and use your other hand and a spudger to disconnect the black ribbon cable labeled “1.”
5th Step
Rotate the display assembly up until it is roughly vertical. This will allow easier access for disconnecting the remaining cables.
Use a spudger to disconnect the black ribbon cable labeled “2.”
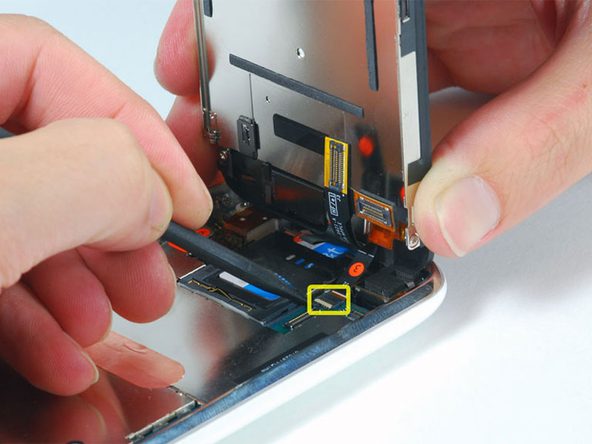
6th Step
Use a spudger to flip up the white plastic tab holding the remaining ribbon cable in place. The white tab will rotate up 90 degrees, releasing the ribbon cable.
Slide the black ribbon cable out of its connector, and remove the display assembly from the iPhone.
7th Step
Insert your SIM eject tool or a paper clip into the hole next to the headphone jack.
Press down on the tool until the SIM card tray pops out.Grasp the SIM card tray and slide it out of the iPhone.
8th Step
Use a spudger to disconnect the ribbon cable labeled “4.”
9th Step
Use a spudger to disconnect the ribbon cable labeled “5.”
10th Step
Use a spudger to disconnect the ribbon cable labeled “6.”
If you have an iPhone 3GS, refer to picture 2 and use a spudger to disconnect the ribbon cable labeled “7.”
Carefully peel up the small sticker labeled “Do not remove.”
12th Step
Remove the following 8 screws:Five 2.3 mm Phillips #00 screws with partial threads securing the logic board to the rear panel.
Two 2.3 mm Phillips #00 screws with full threads securing the logic board and camera.
One 2.9 mm Phillips #00 screw from beneath the “Do not remove” sticker.
13th Step
Use a spudger to gently pry the camera up and out of its housing in the rear panel. The camera cannot be removed entirely yet because it’s connected to the bottom of the logic board.
14th Step
Use a spudger to gently pry up the end of the logic board closest to the dock connector.
If the board won’t lift up, double check to make sure all the screws securing the logic board have been removed.
15th Step
Slide the logic board towards the dock connector and out of the iPhone.
Use a spudger to disconnect the camera from the logic board.
Be very careful when opening the iPhone so that the cables under the display are not severed.coque iphone 4